How to write and debug scripts and triggers in Eclipse
Additional features can be implemented in TrackStudio using scripts and triggers. Scripts generally correspond to computable custom fields of different types. Triggers correspond to the events, occurring with the tasks, particularly: creation of tasks, their editing and execution of operations on them. Scripts run every time while viewing the task, when the value of field needs to be displayed, and triggers – at the time of executing the associated actions.
Scripts and triggers can be of two types: interpretable and compiled. Interpretable scripts are the java-code, processed by the interpreter Beanshell. These scripts are quite easier to write than the compiled ones, as it is not required to match the types of data, moreover availability of JDK is also not required for compilation.
Compiled scripts have a number of major benefits:
- first of all, they are executed faster due to the fact that loading and initialization of interpreter is not required
- secondly, if script is compiled – it doesn’t have syntax errors
- thirdly, in compiled scripts you can use the entire features of java language. For example, inheritance and static variables.
Writing of scripts in IDE (integrated development environment) is the most feasible way.
Eclipse is the cross-platform free-to-use IDE for applications developed and supported by Eclipse Foundation. Eclipse can be installed in Windows, Linux as well as in OS X. Eclipse can be downloaded from the project site. Ubuntu users can install Eclipse directly from the Applications Center.
- Install and run Eclipse IDE.
- Create the workspace.
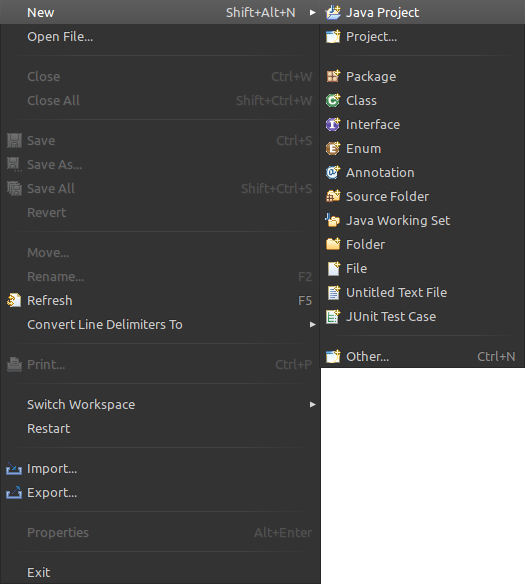
- In the menu, open File → New → Java Project
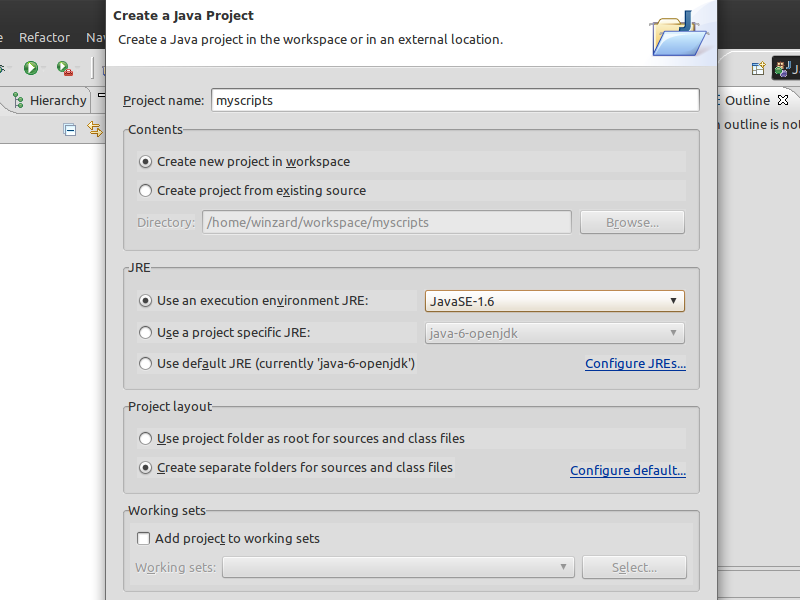
- Create a new project
- Press the button Next
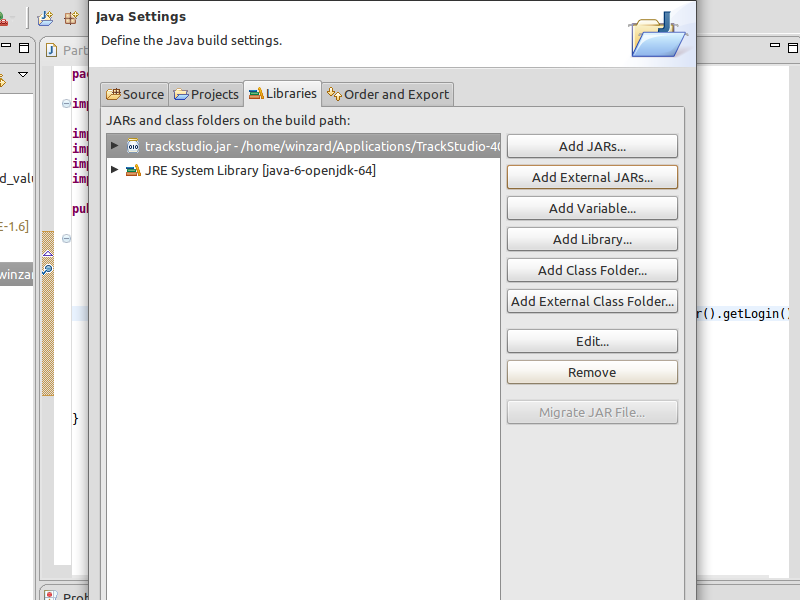
- In the next screen, go to the tab Libraries
- Press the button Add External JARs
- Select the library trackstudio.jar (webapps/TrackStudio/WEB-INF-lib/trackstudio.jar)
- Press the button Finish
This completes the creation and configuration of project. Write and compile some script, using TrackStudio API. For example, the script, displaying the list of participants of the task(from examples )
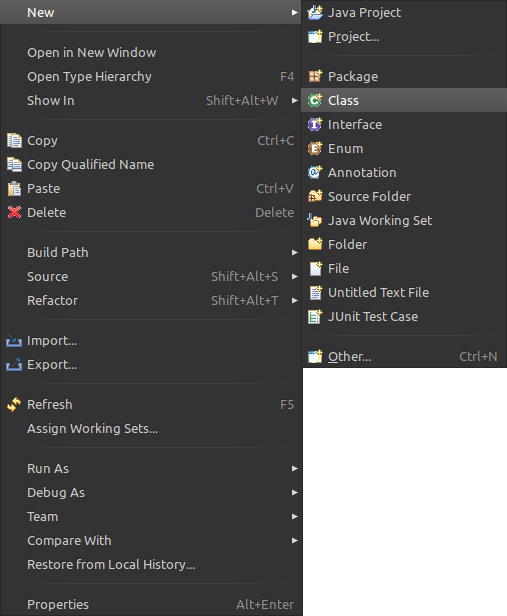
- In the left panel, open the folder of your project and in the sub-folder src right click the mouse
- In the pop-up menu, select New → Class
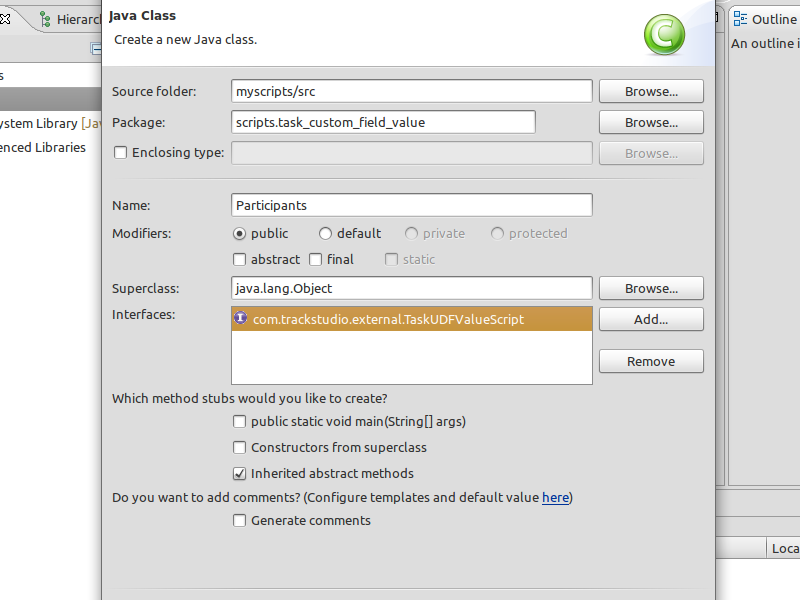
- Enter Package Name: scripts.task_custom_field_value
- Enter the class name: Participants
- Select the interface: TaskUDFValueScript
- Press the button Finish, so as to complete the creation of class
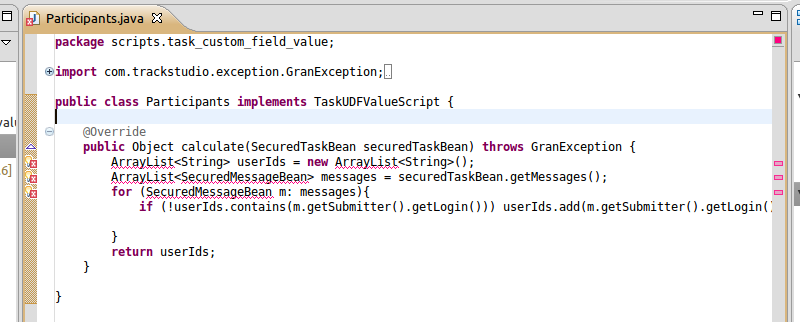
- Paste the method calculate from the example or write your own.
You can see that Eclipse immediately detects lots of bugs in the code. If cursor is brought to the word highlighted in red, in the drop-down menu Eclipse offers the correction options. In this case, you need to import the respective classes. Do this.
In this case, automatic compilation of classes has been enabled in Eclipse, therefore after correction of bugs a subfolder scripts/task_custom_field_value, with class Participants.class must appear in the folder workspace/myscripts/bin.
Copy this class, better the entire folder of scripts, to the folder etc/plugins of your instance of TrackStudio. At the same time, folders of scripts must be combined.
Debugging of scripts
- In any text editor(not Word), open the file startJetty.vmoptions, which is located in the root of your instance of TrackStudio.
- At its end, add the line -Xdebug -Xrunjdwp:transport=dt_socket,server=y,suspend=n,address=5005
- Run your instance of TrackStudio
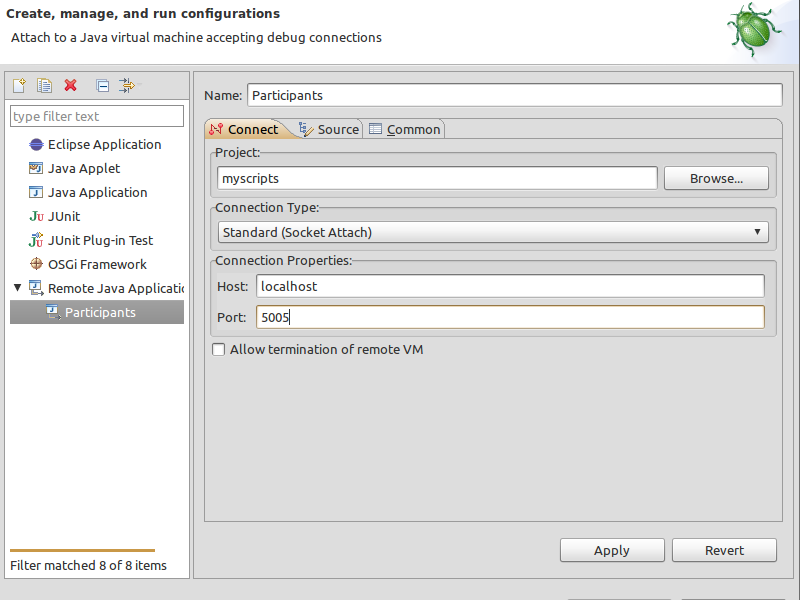
- Go to Eclipse in the menu Run → Debug Configurations
- Select Remote Java Application and press the icon New above
- Enter the port number 5005
- Press the buttons Apply and Debug
- From the Eclipse menu Run you can manage the stop points. Set one stop point somewhere in the beginning of method calculate of the class Participants
- Open the browser
- In it, open your instance of TrackStudio and enter into the system.
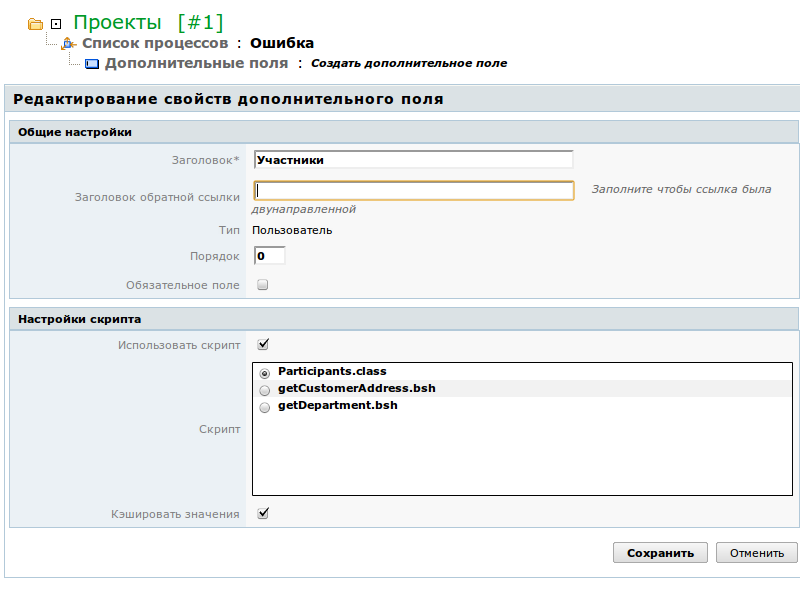
- For any of the workflow, create a custom field of type “User” and connect the class Participants to it.
Thereafter, go to the task, using this computable field. If everything has been done properly, execution of script must stop at the specified point. Eclipse will suggest opening of debugging window and, if you agree, it will show the code of script with highlighted line at the place of stop.
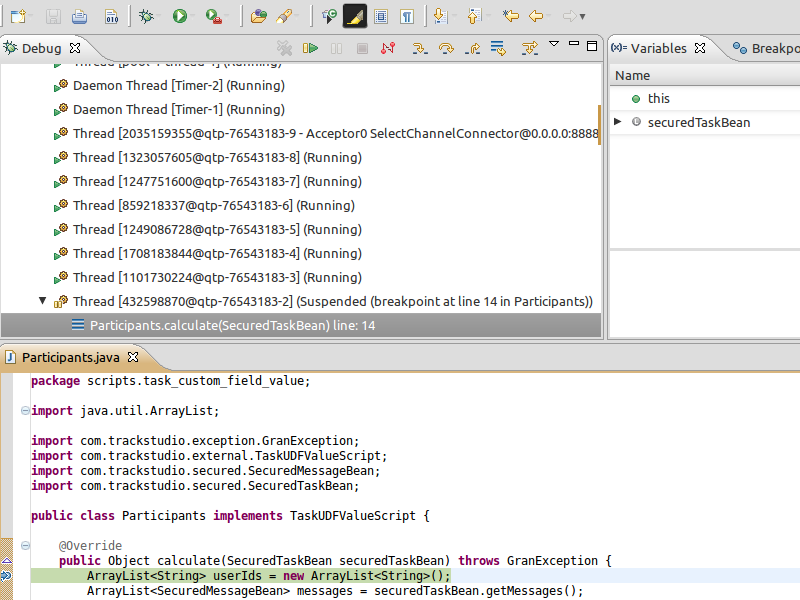
In the tab Variables, you can see the variables and their values updated in the visibility region, and through the tab Debug — manage the execution of script.
Key Resume (F9) continues the execution of code till next stop point. Key Step Into (F5) executes the current line of code with entry inside the method, if in the given line method of some class has been called. Key Step Over (F6) simply executes the line without entering the methods. Key Step Return (F7) executes the entire code till exit from the method and hands over the control “higher up the order”.
Usage of TrackStudio API
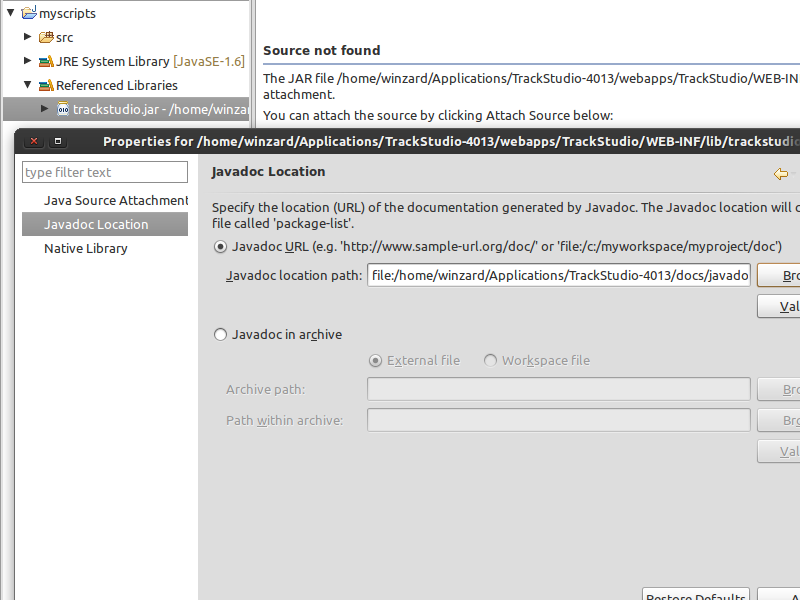
To Eclipse connect the documentation TrackStudio Javadoc, which is located in the folder docs of your instance of TrackStudio. For this purpose:
- In the left panel, expand the block Referenced Libraries
- Select trackstudio.jar
- By right clicking the mouse, open the context menu and select the item Properties (or press Alt-Enter)
- Select the item Javadoc Location
- Specify the folder javadoc of your instance of TrackStudio (docs/javadoc)
- Press the button Apply
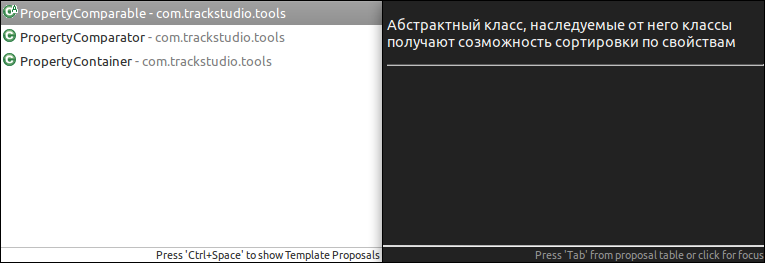
In the lower panel of Eclipse editor, there is a tab Javadoc in which you can see the description of classes and methods, to which the cursor points.
If you start entering the name of class and press the combination of keys Ctrl-Spacebar, Eclipse will offer the options of classes for selection, and at the same time description of class from Javadoc is displayed.